Create a Peaceful, Streamlined Space for Your Culinary Essentials
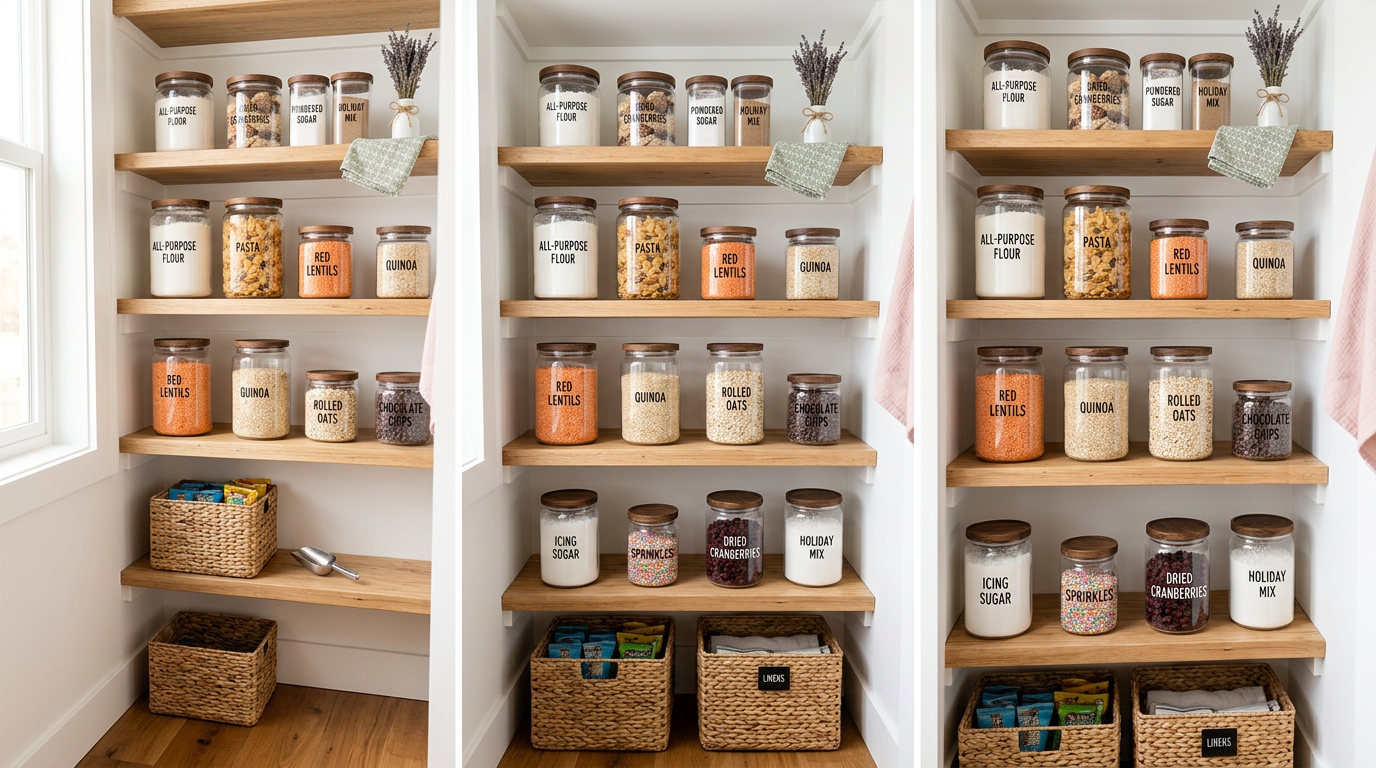
Imagine opening your pantry door and feeling an immediate wave of calm. Instead of a chaotic mountain of half-opened cereal boxes, chip clips dangling from torn plastic bags, and spilled flour dusting the shelves, you are greeted by neat rows of uniform, crystal-clear canisters. You can see exactly what you have at a glance, the colors of your grains and spices create a beautiful natural palette, and everything feels wonderfully intentional. Transitioning to the best pantry containers with airtight lids is not just about aesthetics; it is a powerful daily ritual that helps you declutter your home, reduce food waste, and reclaim your peace of mind.
As we head into the busy holiday hosting and baking season, our kitchens quickly become the high-traffic heart of the home. Preparing festive meals, baking batch after batch of heirloom cookies, and welcoming loved ones requires a space that works with you, not against you. By investing in high-quality storage solutions now, you prepare your home for the seasonal rush, making meal prep effortless and clean-up a breeze. Let us dive into how you can choose the perfect containers to transform your kitchen into a serene sanctuary where you can truly breathe easier.
Why the Best Pantry Containers with Airtight Lids are a True Kitchen Game-Changer
When we look at professional home organization transformations, the single most impactful step is almost always decanting dry goods into dedicated containers. But why is this step so critical? The secret lies in the seal. Standard packaging from the grocery store is designed for shipping and shelf display, not for long-term freshness or easy kitchen utility. Once a bag of flour or sugar is opened, it is immediately exposed to air, humidity, and microscopic pests. Utilizing the best pantry containers with airtight lids creates an impenetrable barrier that locks in freshness, ensuring your baking ingredients remain soft, your crackers stay perfectly crisp, and your bulk goods last for months.
Beyond food preservation, decanting offers incredible visual benefits. When you eliminate the visual noise of mismatched, brightly colored corporate packaging, your pantry instantly looks cleaner and more spacious. This visual reset directly impacts your mental state, lowering stress levels when you cook. It also saves you money. How many times have you purchased a duplicate box of brown sugar because the original bag was crumpled and hidden at the back of a dark shelf? Clear canisters give you an instant, accurate inventory of your kitchen staples, helping you shop smarter and live more sustainably.
If you are already on a journey to simplify your surroundings, organizing your dry ingredients is a natural next step. Taking control of your food storage aligns beautifully with a broader minimalist living guide, helping you focus on quality over quantity and appreciate the functional beauty of everyday items. When your pantry is streamlined, cooking becomes a joyful, creative process rather than a stressful chore.
Practical Tips for Choosing and Arranging Your Pantry Containers
Tip 1: Match the Container Shape to Your Shelf Depth
When selecting your storage set, consider the physical layout of your pantry shelves. Square and rectangular canisters are the absolute best choice for maximizing space because they sit flush against one another, leaving zero wasted gap. They are ideal for deep shelves or tight cabinet corners. Round canisters, on the other hand, offer a beautiful, classic look that works wonderfully on open shelving or shallow pantry doors where you want to create a softer, more organic aesthetic. Always measure your shelf height and depth twice before purchasing any containers to ensure a perfect fit.
Tip 2: Choose the Right Material for Your Family Lifestyle
The debate between glass and BPA-free plastic comes down to your household needs. Glass containers are incredibly durable, stain-resistant, and do not absorb food odors, making them perfect for storing items like coffee beans, loose-leaf teas, and colorful spices. However, they are heavy and can break if dropped. If you have young children who love to help in the kitchen, high-quality, shatterproof BPA-free plastic canisters with secure latching lids are a much safer, lightweight alternative that still offers crystal-clear visibility.
Tip 3: Size Containers to Match Standard Grocery Quantities
One of the most common decanting mistakes is buying a container that is too small for a standard bag of flour or sugar, leaving you with a half-empty bag that still has to be stored elsewhere. To avoid this, keep these basic conversions in mind: a standard 5-pound bag of flour requires a container with a capacity of at least 4 quarts (or about 16 cups). A standard 4-pound bag of sugar fits perfectly in a 3-quart container. For smaller baking staples like baking soda, chocolate chips, or cornstarch, look for smaller 1-to-2-cup jars that can be grouped together on a lazy Susan.
Tip 4: Embrace the Power of Modular Stacking
The best pantry systems utilize vertical space. Look for airtight containers specifically designed with recessed lids that allow another container of the same brand to stack securely on top. This modular approach allows you to stack two smaller canisters of nuts or seeds directly on top of a larger canister of oats or rice, doubling your usable shelf space and keeping your pantry looking beautifully cohesive.
Common Pantry Organization Mistakes to Avoid
Even with the best intentions, it is easy to fall into a few common organization traps. First, many homeowners buy beautiful container sets before they actually declutter your home. If you buy containers for items you rarely eat just because they look pretty, you are simply organizing clutter. Always purge expired, stale, or unloved items first so you only spend money housing the food you actually use and enjoy.
Second, do not forget to label your containers. While it might seem obvious that white powder is flour, it is incredibly easy to confuse all-purpose flour, bread flour, powdered sugar, and cornstarch once they are out of their original packaging. Use a simple, water-resistant label maker or elegant chalk labels on the front of each jar. For an extra touch of organization, write the expiration date on a small piece of painter’s tape and stick it to the bottom of the container.
Finally, avoid choosing lids with overly complex mechanical parts that cannot be easily washed. Some popular push-button lids can trap water inside the spring mechanism during washing, which can lead to mold growth if not dried completely. Look for lids with simple, removable silicone gaskets that can be easily popped out, washed, air-dried, and reassembled to maintain a perfectly hygienic food environment.
Your Step-by-Step Pantry Transformation Action Plan
Ready to turn your pantry into an organized haven? Follow this simple, encouraging step-by-step guide to achieve a stunning transformation in just one afternoon.
- Start Here: The 15-Minute Shelf Purge. Pick just one shelf in your pantry. Take absolutely everything off that shelf and wipe it down. Throw away anything that is expired, stale, or has been sitting unused for more than six months. This quick win will give you the immediate momentum you need to tackle the rest of the space.
- Gather Your Cleaning Supplies. Keep your favorite eco-friendly cleaners, microfiber cloths, and scrub brushes close at hand. Having a dedicated kit makes the process seamless; check out our guide on cleaning caddy organization essentials to keep your cleaning tools perfectly sorted.
- Sort and Group by Category. Group your remaining pantry items into logical zones: baking essentials, grains and pastas, breakfast cereals, snacks, and canned goods. This helps you determine exactly how many large, medium, and small containers you will need.
- Decant into Airtight Containers. Pour your staples into your dry-cleaned containers. Use a wide-mouth funnel to prevent spills, especially when transferring fine powders like cocoa or flour. Secure the airtight lids and press or latch them down to engage the seal.
- Label and Arrange. Apply your labels to the front of the jars at a consistent height for a clean, uniform look. Place your tallest containers at the back of the shelf and shorter ones in the front, or utilize tiered shelf risers so nothing gets lost in the shadows.
The Ultimate Pantry Container and Organization Resource Guide
To help you select the absolute best tools for your space, here is a breakdown of our favorite container styles and supplementary organization products that work beautifully together:
- Push-Button Acrylic Canisters: These are the gold standard for ease of use. With a simple press of a button on the lid, the silicone seal expands to create an airtight lock. They are lightweight, stackable, and perfect for everyday items like cereal, pasta, and snacks.
- Glass Jars with Bamboo Clamp Lids: If you love a warm, organic, and cozy aesthetic, these are a gorgeous choice. The natural bamboo lid features a silicone ring and a metal clamp lock that keeps air out while adding a beautiful, rustic touch to open shelves.
- Glass Mason Jars: An affordable, timeless, and incredibly durable option. Wide-mouth quart-sized mason jars are perfect for storing nuts, seeds, dried beans, and homemade granola. They are dishwasher safe and easy to replace if needed.
- Supplementary Tools: To maximize your new setup, pair your containers with expandable shelf risers to create extra vertical tiers. A lazy Susan is excellent for keeping smaller spice jars or oil bottles easily accessible. You can also explore creative dinnerware storage solutions if you need to free up cabinet space nearby for your new pantry layout.
Step Into a Lighter, More Organized Kitchen Today
Transforming your kitchen pantry with the best pantry containers with airtight lids is one of the most rewarding home projects you can undertake. By replacing visual clutter with clear, beautiful, and functional storage, you create a space that supports your daily life, saves you time during meal prep, and keeps your food fresh and delicious. There is nothing quite like the feeling of opening your pantry to find a peaceful, streamlined system that makes you want to cook, bake, and share beautiful meals with the people you love.
Do not wait for a complete kitchen remodel to experience the joy of an organized home. Start small today with our 15-minute shelf purge, choose a container style that fits your aesthetic, and enjoy the simple pleasure of a beautifully ordered life. Your calm, clutter-free kitchen is just a few simple steps away!